What Hand-Building Techniques Can You Learn in Pottery Workshops?
In pottery workshops, you'll learn several hand-building techniques. The pinching technique allows you to create organic forms by shaping clay with your fingers. Coiling involves stacking and joining clay coils to build various forms. Slab building starts with rolling out clay into sheets, perfect for making items with neat lines. You'll also explore surface decoration like slip trailing, underglaze painting, sgraffito, and carving to add intricate details. Basic glazing techniques will help you add the final, colourful touches to your pieces. Workshops often include beginner projects like pinch pot bowls and more advanced ones like animal sculptures. There's much more to discover ahead!
Key Points
- Pinching technique for creating unique textures and organic forms.
- Coiling technique for stacking and joining clay coils into various forms.
- Slab building for constructing items with neat lines and sharp edges.
- Slip trailing for adding raised patterns with liquid clay.
- Sgraffito for intricate designs by scratching through slip or glaze.
Pinching Technique
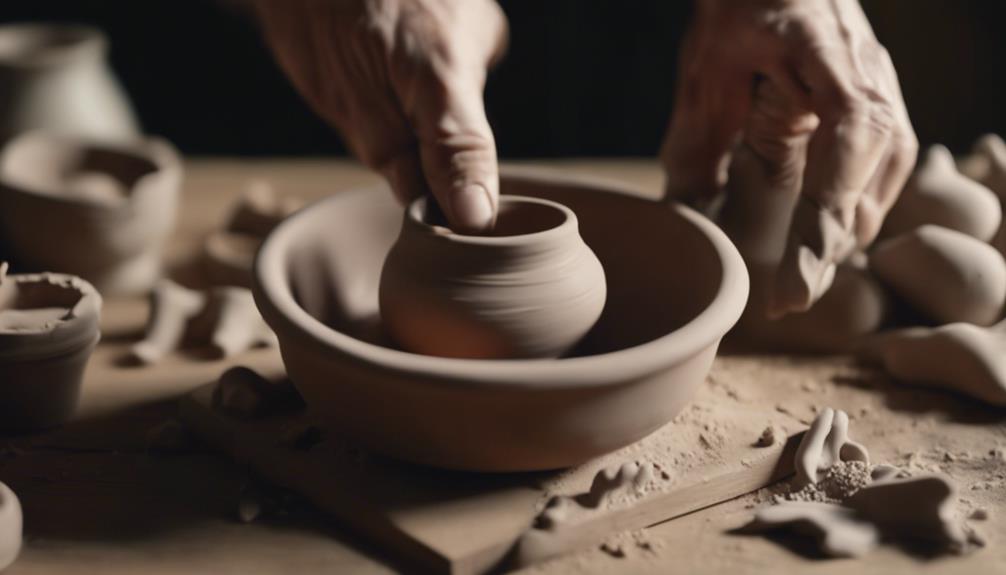
Pinching clay involves using your fingers to shape it into small, rounded forms like bowls or pots. When you engage in this technique, you're tapping into one of the oldest hand-building methods. By carefully pressing and pinching the clay between your fingers, you create unique textures and organic forms that feel both ancient and personal.
In a pottery workshop, this technique offers a wonderful way to connect deeply with your material. Pinching allows for intuitive shaping, meaning you can let your hands guide the process without overthinking each step. Every movement you make with your fingers influences the final shape and texture of your piece, making each creation distinctly yours.
You'll find that pinching helps you develop a tactile connection with the clay. This hands-on approach encourages you to explore and experiment, fostering a sense of belonging within the pottery community.
As you refine your pinching skills, you'll notice how the clay responds to different pressures and angles, allowing you to achieve various textures and finishes. Whether you're a beginner or experienced potter, pinching is a versatile and rewarding technique that enriches your pottery experience.
Coiling Technique
After exploring the tactile and intuitive nature of pinching, you can expand your hand-building skills with the coiling technique. Coiling involves stacking and joining rope-like coils of clay to create pottery. This ancient technique allows you to build a variety of forms like vases, pots, and sculptures. To master coiling, you'll need to pay close attention to coil size, clay consistency, and structural integrity.
In workshops, you'll discover coiling variations that open up possibilities for advanced projects. You can experiment with different shapes and sizes, combining coils to form intricate patterns or larger, more complex pieces. Coiling troubleshooting is also essential; ensuring your coils are uniform and well-joined will prevent structural issues down the line. With these creative design tips, you can make unique and personalised items.
Here are some quick tips to improve your coiling experience:
| Tip | Description |
|---|---|
| Coil Size | Keep coils consistent for a stable structure. |
| Clay Consistency | Confirm clay is neither too wet nor too dry. |
| Joining Coils | Score and slip to securely attach coils. |
| Creative Design | Experiment with patterns and combined techniques. |
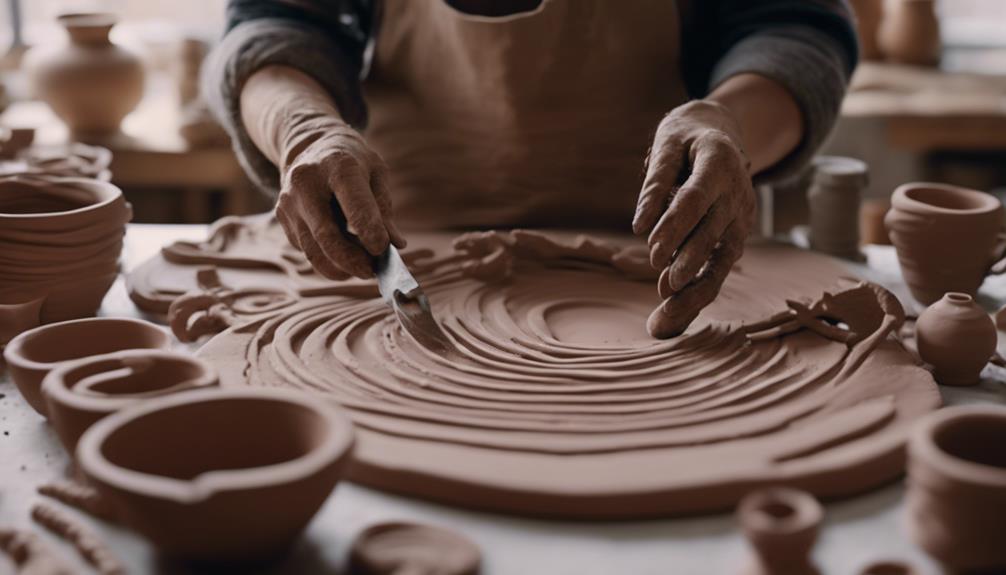
Slab Building
In slab building, you begin by rolling out clay into flat sheets, which you can then cut into specific shapes.
Using templates can assist you in constructing forms with precision, ensuring each piece fits together perfectly.
This technique is excellent for making items such as plates and boxes, where neat lines and sharp edges are crucial.
Rolling and Cutting Slabs
Rolling and cutting slabs are essential skills in hand-building pottery, allowing you to create precise and intricate designs. When you roll out clay, you need to pay close attention to slab thickness to guarantee uniformity, which helps in constructing stable and balanced pieces. You can also experiment with surface texture by pressing different objects into the clay or using texture mats, adding a unique touch to your creations.
In slab construction, precision is key. Cutting slabs allows you to shape the clay accurately, enabling you to bring your creative visions to life. Whether you're crafting a simple box or an elaborate sculpture, the way you cut and handle your slabs will make a big difference in the final piece.
Joining techniques like scoring and slipping are vital to adhere slabs together securely. Scoring involves scratching the surfaces that will be joined, and slipping uses a liquid clay mixture to bond them. Mastering these techniques ensures your pieces aren't only beautiful but also durable.
Constructing With Templates
To achieve consistent shapes and sizes in your creations, constructing with templates becomes a valuable technique in slab building. This method allows you to transform flat sheets of clay into stunning pottery pieces with ease and accuracy. By using templates, you optimise the process, guaranteeing each piece meets your desired specifications.
In pottery workshops, you'll learn to roll out clay slabs evenly, matching the dimensions of your templates. This practice not only improves your efficiency but also opens up a world of creative possibilities. You can experiment with various forms, knowing that the template will guide you towards consistency and precision.
Here are four benefits of constructing with templates:
- Consistency: Templates ensure your pieces maintain uniform shapes and sizes, making your collection cohesive.
- Precision: Achieving exact measurements becomes straightforward, leading to professional-looking results.
- Efficient construction: Templates speed up the building process, allowing you to create more pieces in less time.
- Creative possibilities: With the foundation set, you can focus on adding intricate details and personal touches to each piece.
Mastering this technique not only boosts your pottery skills but also fosters a sense of belonging in the creative community.
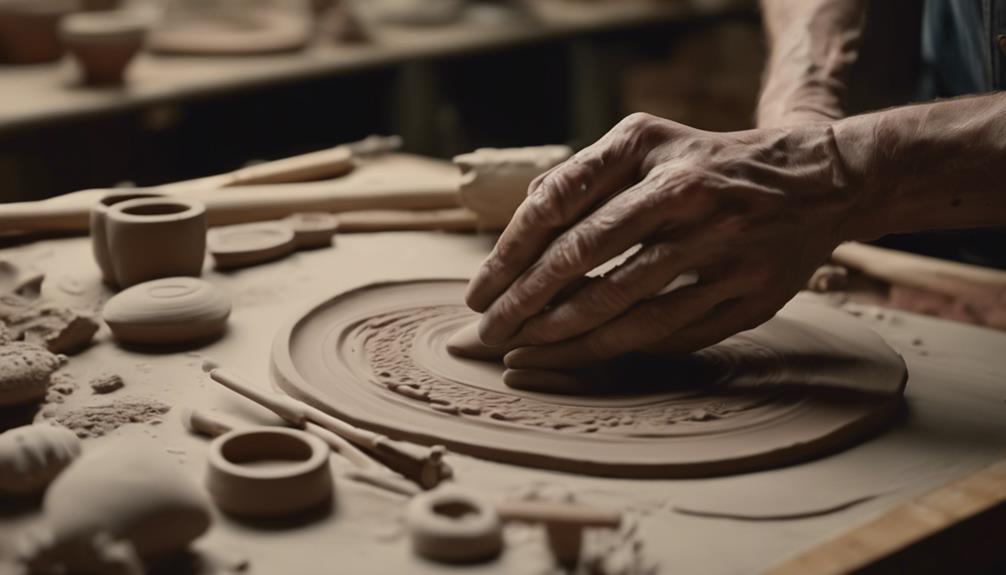
Surface Decoration
Surface decoration techniques in pottery workshops allow you to transform plain clay into stunning works of art. One popular method is slip trailing, where you apply liquid clay, known as slip, through a nozzle to create raised patterns or designs. This technique allows for intricate detailing and adds a tactile element to your piece.
Another favourite is underglaze painting, which uses coloured clay slips or pigments to decorate the surface before firing, offering a wide range of colours and detailed imagery.
Sgraffito is another fascinating technique you'll learn. It involves applying a layer of slip or glaze to your pottery and then scratching through it to reveal the clay body beneath. This method is perfect for creating intricate designs and adding a unique touch to your work.
Carving, on the other hand, lets you cut into the surface of the clay to create depth and texture. This technique can range from simple lines to complex patterns, providing both visual and tactile richness.
Basic Glazing
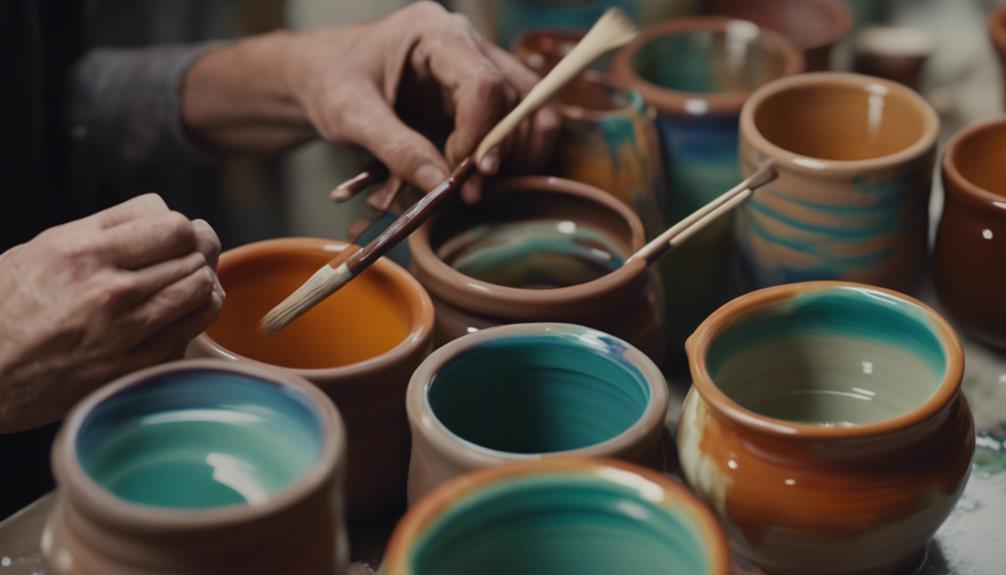
In basic glazing, you'll learn to choose and apply glazes to biscuit-fired pottery for a vibrant, finished look. This process is vital for creating beautiful, functional pieces. You'll start by selecting the right glazes, which can range from glossy to matte finishes. Understanding colour and composition is essential, as it influences the final outcome of your pottery.
One of the exciting parts of glazing is layering colours and experimenting with different techniques. You can create unique effects by combining various glazes.
However, mistakes can happen. Here are four common glazing mistakes and how to troubleshoot them:
- Uneven Application: Ensure consistent coverage by using consistent brush strokes or dipping techniques.
- Blistering: This can be caused by applying glaze too thickly. Apply thinner layers and fire properly.
- Crawling: If the glaze pulls away from the surface, clean your biscuit ware thoroughly before glazing.
- Running: Avoid excessive glaze application, especially near the bottom, to prevent it from running during firing.
Pottery workshops offer a supportive environment where you can practice these skills, share your experiences, and learn from others. By experimenting and troubleshooting together, you'll feel a sense of community and accomplishment in your glazing journey.
Essential Tools
To get started with hand-building in pottery, you'll need some basic tools like wire cutters, pin tools, and scoring tools.
Specialty sculpting tools, such as fettling knives and brayers, can help you add intricate details.
Don't forget to regularly maintain and care for your tools to keep them in top shape.
Basic Hand Tools
Every pottery workshop needs a set of essential hand tools to guarantee precision and professional results. These tools not only make your work easier but also help you create beautiful pieces consistently. Understanding tool maintenance and proper use is key to prolonging their lifespan and ensuring they perform at their best.
Here are four essential hand tools you should have in your pottery toolkit:
- Wire Cutters: These are important for slicing through clay blocks easily and precisely, making it simpler to get the right amount of clay for your project.
- Pin Tools: Perfect for adding intricate details and for tasks like cutting, carving, and piercing the clay. They're versatile and a staple in any pottery toolkit.
- Scoring Tools: These tools help you create texture on the clay's surface and are essential when you need to attach separate pieces of clay securely.
- Banding Wheels: These allow you to rotate your pottery smoothly while decorating or glazing, ensuring an even, professional finish.
Proper tool storage and organisation will save you time and keep your workspace tidy. Always clean and store your tools properly after use to maintain their condition and performance.
Speciality Sculpting Tools
You'll find speciality sculpting tools indispensable for adding intricate details, shaping, and hollowing out your clay creations. These tools, like loop tools, wire end tools, ribbon tools, and pottery knives, are essential for achieving the fine textures and smooth finishes that elevate the quality of your pottery pieces. Made from durable materials like stainless steel and wood, they offer precision and longevity, ensuring that you can depend on them for multiple projects.
Selecting the right tools is crucial. A variety in your toolkit enhances creativity and allows you to experiment with versatile sculpting techniques. When you participate in pottery workshops, you'll quickly see how different tools can transform a simple lump of clay into a detailed masterpiece.
Proper tool storage is also important to keep your workspace organised and your tools in good condition. Having a dedicated place for each tool ensures you can find what you need quickly, maintaining the flow of your creative process.
While you're learning the art of pottery, taking care of your tools is just as important as mastering the techniques. Good tool maintenance and care will prolong the life of your tools, enabling you to focus on your craft.
Maintenance and Care
Maintaining your pottery tools is essential for ensuring their longevity and peak performance in every project. Proper care involves several key practices that you'll want to incorporate into your routine.
First, cleaning techniques are vital. After each use, make sure to remove any clay buildup from your tools. This not only keeps them in good condition but also helps with rust prevention. A simple wipe-down with a damp cloth usually does the trick, but occasionally, a more thorough clean with soapy water might be needed.
Second, regular tool inspection is important. Look for signs of wear and tear, and set up a replacement schedule for items that deteriorate over time. This ensures that you're always working with tools that are safe and effective.
Third, proper storage is a must to prevent damage. Keeping your tools in a dry environment helps avoid corrosion.
Lastly, sharpening your cutting tools, such as fettling knives, maintains their precision and effectiveness.
Here are four essential maintenance practices:
- Clean tools after every use.
- Store in a dry place for rust prevention.
- Inspect regularly and replace as needed.
- Sharpen cutting tools to maintain precision.
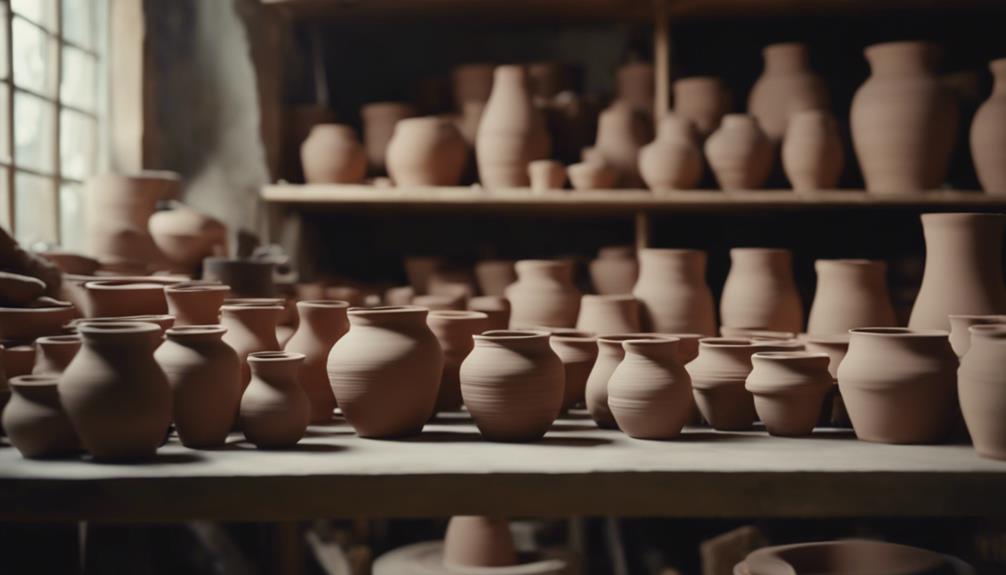
Project Ideas
In pottery workshops, project ideas often include creating pinch pot bowls and coiled pots for beginners, allowing them to grasp fundamental techniques. These initial projects help you get a feel for the clay and understand basic hand-building methods. As you advance, you might explore more intricate projects like sculpting animal sculptures or crafting abstract forms, which let you express your creativity and hone your skills.
No matter your level, you'll find that workshops offer a variety of projects to keep you engaged. For those interested in practical items, creating functional ware such as mugs and plates can be both rewarding and useful. On the other hand, if you prefer to focus on aesthetics, decorative pieces like vases and wall art can provide a satisfying creative outlet.
| Project Type | Examples |
|---|---|
| Beginner Projects | Pinch pot bowls, Coiled pots |
| Advanced Projects | Animal sculptures, Abstract forms |
| Functional Ware | Mugs, Plates |
| Decorative Pieces | Vases, Wall art |
Experimenting with different textures, shapes, and styles is encouraged, helping you develop your artistic voice. Cross-cultural pottery styles and diverse applications are often explored, broadening your understanding of ceramics and giving you a sense of belonging within a global artistic community.
Learning Resources
Explore a variety of learning resources that can improve your hand-building skills in pottery workshops. To truly enhance your techniques, you'll need to tap into multiple educational avenues.
Here are some of the most effective resources you can use:
- Online tutorials: Websites like YouTube and specialised pottery platforms offer countless tutorials. These videos allow you to learn at your own pace, repeat sections, and see techniques demonstrated by experienced potters.
- Community classes: Joining local pottery classes not only provides hands-on experience but also connects you with other enthusiasts. These classes offer personalised guidance and the opportunity to learn from others' experiences.
- Instructional books: Books dedicated to pottery hand-building techniques can be invaluable. They provide detailed explanations, step-by-step processes, and professional tips that you can refer to anytime.
- Video series: Subscription services and educational platforms often offer comprehensive video series on pottery. These series cover everything from basic techniques to advanced projects, ensuring you have a thorough understanding.
Frequently Asked Questions
What are the techniques of hand-building pottery?
You can explore techniques like coil building and slab construction. Coil building allows you to create shapes by stacking rolled clay. Slab construction involves joining flat clay pieces. These methods offer you creative ways to shape your pottery.
What Are the 5 Techniques in Pottery Making?
You'll discover five techniques in pottery making that connect you to ancient methods and spark creative inspiration: pinching, coiling, slab building, sculpting, and texturing. Embrace these skills and join a community of passionate creators.
What Skills Do You Learn in Pottery?
You'll become proficient in preparing clay, perfecting glaze application, and honing your artistic abilities. These workshops encourage a sense of camaraderie, enabling you to craft one-of-a-kind pieces while engaging with others who share similar interests. Come and unleash your artistic flair!
What Techniques Do Pottery Artists Use?
You'll learn surface decoration techniques and glazing methods in pottery workshops. These skills allow you to add intricate designs and vibrant colours to your pieces, making them truly unique and helping you feel part of a creative community.
Conclusion
By immersing yourself in various hand-building techniques like pinching, coiling, and slab building, you'll establish a solid foundation in pottery.
Strengthening skills in surface decoration and basic glazing will enrich your creations.
Understanding essential tools and having project ideas will keep you motivated.
With access to learning resources, you'll continue to improve and innovate.
So, engage in pottery workshops with confidence, knowing you're equipped with the knowledge to create beautiful, handmade pieces.